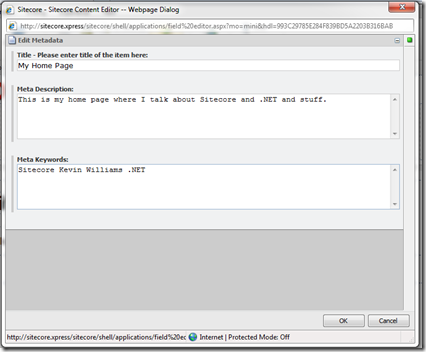
A while back, I wrote about opening Sitecore’s media library browser from a button in the Content Editor ribbon. Recently, I decided it would be really useful to do something similar with the Field Editor dialog – only this time, from the Page Editor’s ribbon. If you’re not familiar with the dialog in question, here’s a screenshot:

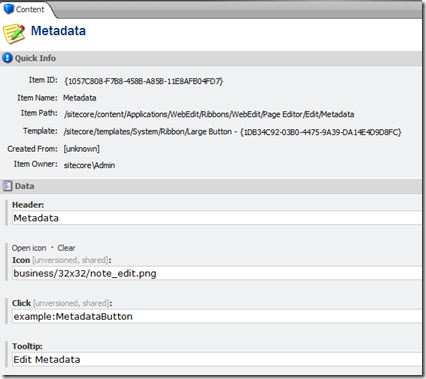
Adding a button to the page editor ribbon isn’t a big deal – it’s very similar to how I added the Thumbnail button to the content editor ribbon. Essentially, I just opened the Core database, drilled down to /Applications/WebEdit/Ribbons/WebEdit/Page Editor/Edit and added a new Large Button. This adds the new button to the “Edit” chunk in the “Home” strip. Here’s a screenshot of that:

And here’s what it looks like in the page editor:

I used a .config file (placed in /App_Config/Include so that Sitecore will automatically load it) to hook the “example:MetadataButton” command to a class in a DLL. That looks like this:
1: <configuration xmlns:patch="http://www.sitecore.net/xmlconfig/">
2: <sitecore>
3: <commands>
4: <command name="example:MetadataButton" type="Kevin.MetadataButton, MetadataButton" />
5: </commands>
6: </sitecore>
7: </configuration>
So all that leaves is the code to actually open the field editor… I had to do some digging with .NET Reflector to figure this out. Thank you Sitecore, for not obfuscating this stuff! Here’s the critical bit of code:
1: // Get the field descriptor objects.
2: ListString fieldNames = new ListString("Title|Meta Description|Meta Keywords"); 3: var fields = fieldNames.Select(f => new FieldDescriptor(item, f));
4:
5: // Set the field editor options.
6: PageEditFieldEditorOptions options = new PageEditFieldEditorOptions(form, fields)
7: { 8: Title = "Edit Metadata",
9: Icon = string.Empty
10: };
11:
12: // Show the dialog.
13: SheerResponse.ShowModalDialog(options.ToUrlString().ToString(), "720", "520",
14: string.Empty, true);
15: args.WaitForPostBack();
What this does is creates a list of FieldDescriptor objects for the named fields on the current item, constructs a PageEditFieldEditorOptions object, and calls SheerRespose.ShowModalDialog(). Just like in my ThumbnailButton module code, we wait for a postback. When that postback comes in, this one line of code takes the values from the field editor and saves them into the current item:
1: PageEditFieldEditorOptions.Parse(args.Result).SetPageEditorFieldValues();
I’ll attach the full .cs file and .config file to this post once it’s live on my blog in case you don’t want to mess with all of the details yourself. UPDATE: Attachments don't seem to be visible to everyone on the DNM site, so here's a link to the ZIP file: http://www.killeverything.com/zak/MetadataButton.zip
In other news – as of April of 2012, my employer (The Revere Group) have taken on the parent company’s name. Along with several other affiliated companies in North America, we are now collectively known as NTT DATA. I’m proud to be a part of the NTT DATA family here in the Americas, and am looking forward to new opportunities the combined companies will be able to tackle!