How to: Create a Workflow to send a file to the Records Center
Posted
Monday, January 26, 2009 1:48 PM
by
CoreyRoth
Today's topic is certainly one of those features that seems like it should be included out of the box. Luckily, it is pretty simple to implement. My required was that I needed a file send to the records center whenever it is created, modified, or checked in. I considered using an ItemEventReceiver, but decided creating a simple workflow would be easier to attach to multiple document libraries. You could use the same code in an event receiver though.
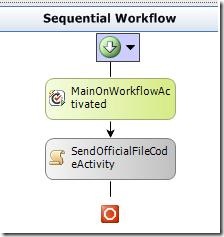
My workflow is simple. It contains an OnWorkflowActivated and a Code activity. The OnWorkflowActivated activity is only used to set the workflowProperties object.
private void SendOfficialFile(object sender, EventArgs e)
{
SPFile documentFile = workflowProperties.Item.File;
string recordSeries = documentFile.Item.ContentType.Name;
string additionalInformation;
OfficialFileResult fileResult = documentFile.SendToOfficialFile(recordSeries, out additionalInformation);
}
As you can see there really isn't a lot of code required to make this happen. I simply get the SPFile object from the SPWorkflowProperties object and call its SendToOfficialFile method. This method takes two parameters, recordSeries and additionalInformation (an out parameter). It took me a while to find some documentation on what to put in these. The first example, I saw just left the recordSeries parameter blank. This will work, but it will also cause all of your files to go to the Unclassified Records routing rule. After some digging, I discovered you are supposed to set it to the name of the item's content type (which would have a routing rule matching its name). The OfficialFileResult enum will give you a value of Success if the file was submitted alright, otherwise it will give you a value or MoreInformation which means you can examine the value of the additionalInformation parameter to find out what went wrong.
Once you have your code activity completed, you are ready to compile and deploy the workflow. Deploy the workflow and attach it to your document library. Choose wether you want it to execute on new items or modified items. Once you have done that, you are ready to test it out. Upload a file or modify an existing one and check your records center to see if the file is there. Before you start this process, be sure and verify that your records center is functioning to begin with by manually sending a file to the records center with the send to menu option.
At a minimum, this is all that is really required to get a file into the records center. As usual, I left out exception handling code to keep the post short. One thing to note, Records Center requires the file to be checked in. You can choose to handle this. Some people may not want the file to be sent in the records center, others might want it to just be checked in. You can determine if the file is checked in by looking at the Level property on the SPFile object.
For more information on handling ShortTerm CheckOut locks, see this post.